Sunday, March 30, 2014

Proline Pro-2 build

Hello again! So I missed racing last week so that I could start putting together my Proline Pro-2 SCT.


The Kit comes with lots of premium parts. The chassis comes partially built with the transmission and other plastic parts already installed. You get a sweet Flo-Tek and some pre-mounted tires.


Check out the chassis here. The weight distribution feels good, but as more parts are added, the center of gravity quickly shifts to the rear.


I added the carbon braces right off the bat in order to stiffen up the shock towers. The plastic is very flexible with this truck, and it can be bent to extreme angles without breaking. This truck is beefy and it designed to not break.


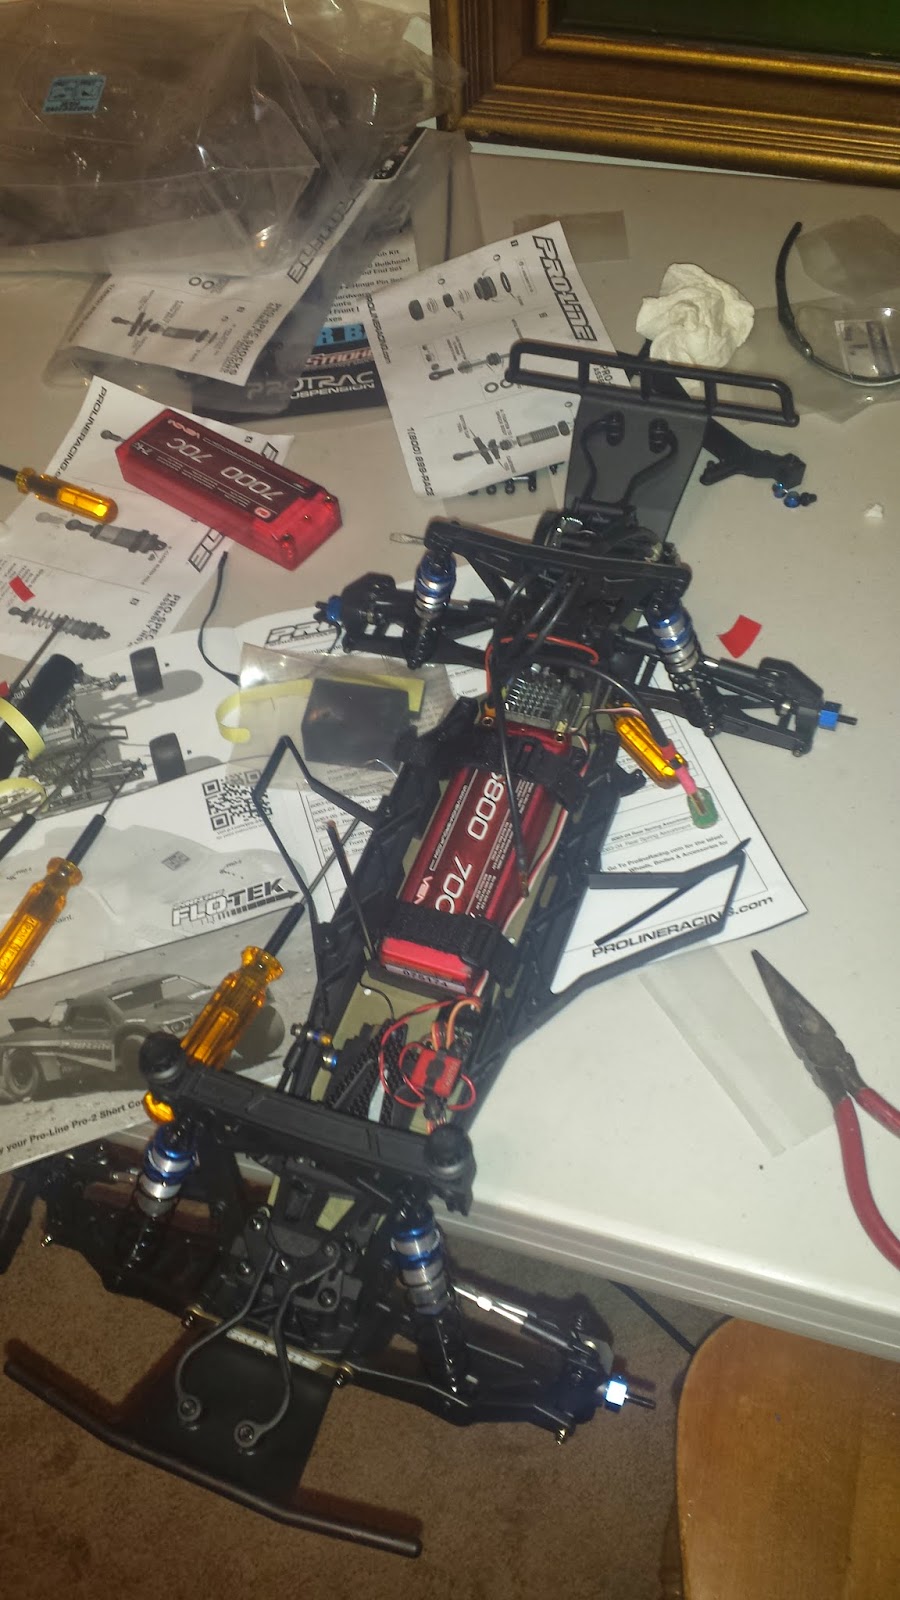
It took me a good 8 hours to get the kit put together the way I liked. I ended up replacing the shocks that come with the kit with the Pro-Spec shocks from Proline. I will cover the build of those in another post.


After I got the truck together, I took it for a little drive in the street and I noticed that the truck would not stop doing wheelies. The placement of the battery needed to be put all the way forward, but my electronics did not have long enough wires. I ended up buying some 6 inch  extension wires so that I could move the battery all the way forward and move my electronics wherever I wanted.


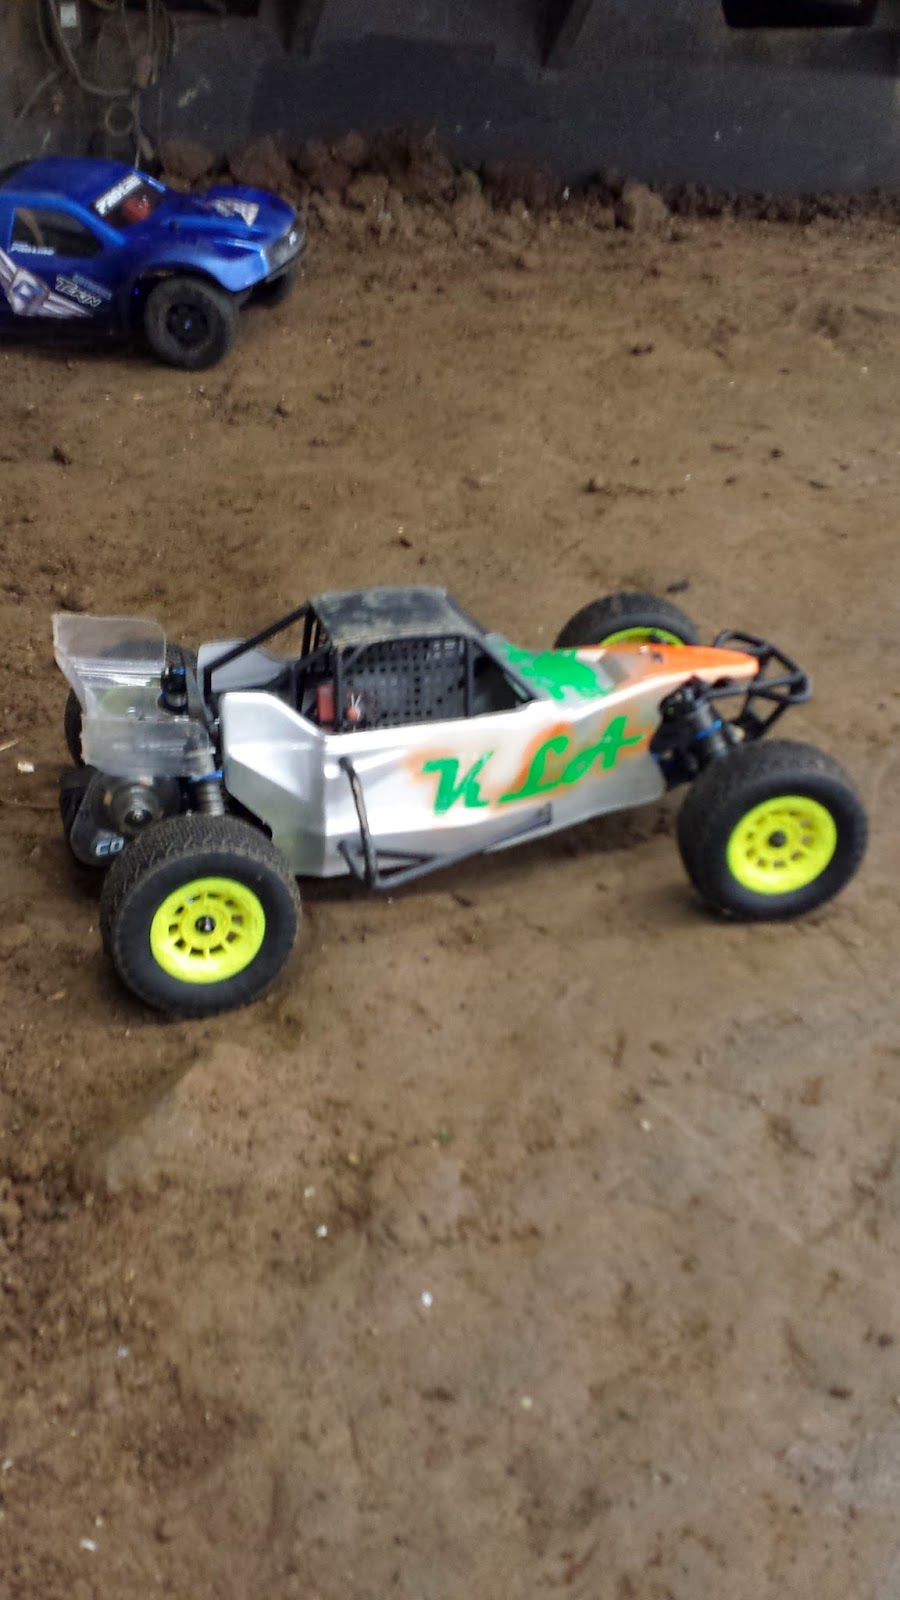
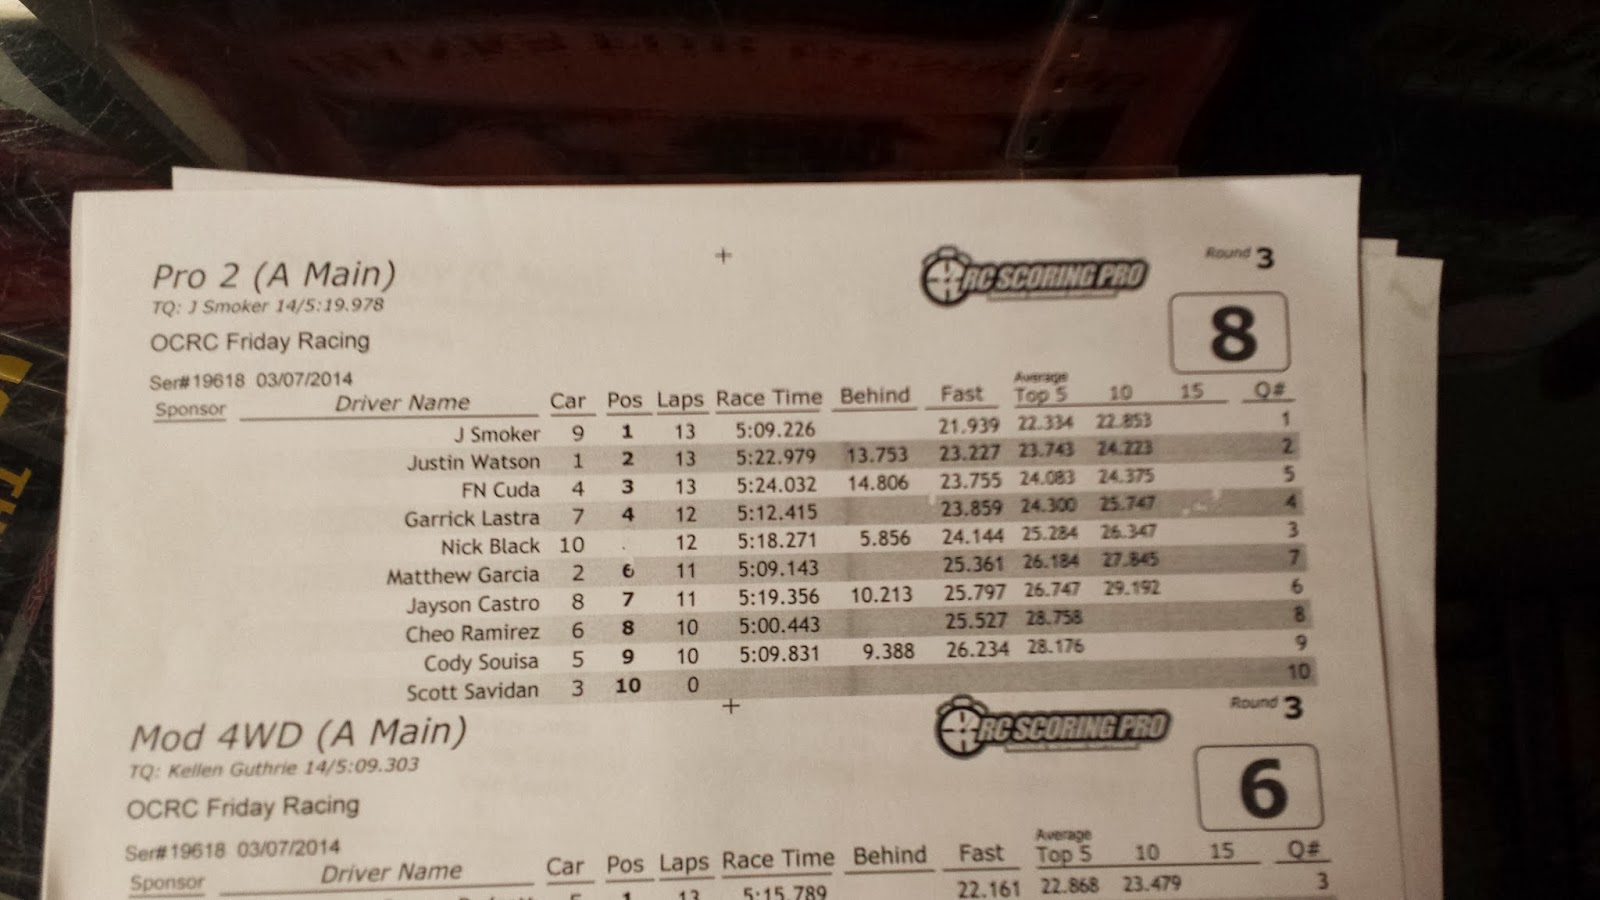
After adjusting the battery position, the truck handled amazing. I did notice that the steering was a little sluggish, but that was fixed by replacing the servo saving linkage with a fixed one. While at the track the other week, I noticed another driver break his Proline Pro-2 in a race, but the truck was not actually broken. The front C hubs are very flexible plastic and they merely warped out of position. I decided to upgrade the hubs with some aluminum parts from STRC. I will show the steering and hub upgrade in  another post. Overall my first impressions of the truck are good. We will see how it works this friday at the races.

Good luck at the races! Remember, you can always ask me for help, just look for the Pro-Line vehicles with the KLA logo at the track.

-Matthew Garcia


FactoryOne AE Big Bore Ultra Bushing Kits Review

Hello again! I am writing about my last upgrade I performed before the Friday races at OC/RC two weeks ago.


I upgraded the shock rings and plastic pieces with some machined Pieces I got from Factory One. These plastic pieces are machined to provide the utmost precision. There are no burs to trim or anything like that. The O rings and spacers fit perfectly in the big bore shocks on my SC10.2. There is no slop and the smoothness of the shock can be felt instantly. Also, no leaking! Thats right! The shocks no longer leak any oil. Anyone who has driven an Team Associated vehicle should know what I mean.


I ended up putting the rebuild kit into both my buggy and truck and I ended up dropping a full second in my lap times! Honestly, this was one of the best upgrades I have made for my vehicles.


I ended up taking 4th in Pro-2 that night and another 1st place finish in Rookie. I was very pleased with how my vehicles performed to say the least.


Good luck at the races! Remember, you can always ask me for help, just look for the Pro-Line vehicles with the KLA logo at the track.

-Matthew Garcia


Saturday, March 29, 2014

Making the switch!


So I have been a little MIA lately and it is because I have been working on making the switch to all Pro-Line vehicles.  I loved my Associated vehicles but it was time for something new and fresh. I am proud to say that I now run the Pro 2 shortcourse truck and buggy developed by Pro-line! I am also switching to all Pro-Line tires and wheels.

I tried the Ion clay tires the other week at Oc/Rc and I instantly fell in love with them. Normally I never believe what the package says, but this time it lived up to the hype. The tires are hooked up! I will be posting my progress with the my new Pro-2 SCT very soon.


Good luck at the races! Remember, you can always ask me for help, just look for the Pro-Line vehicles with the KLA logo at the track.

-Matthew Garcia

Sunday, March 16, 2014

Friday Night Racing Series at OC/RC

Another night at the friday night points series held by OC/RC went great! There was a pretty good turnout with roughly 100 entries and 12 rounds of racing. All the modifications I made last week performed flawlessly with not one break in the car or popped ball cup. The tires I had made for my buggy performed very well.


Here is a shot of the buggy before round one of racing. Clean tires and the perfect ride height helped the buggy handle like a slot car.


Here is a shot of the racers before round one of racing started.
The track is no longer fresh and the racing line is very clear. The traction was very good, with many guys setting new track records! A lot of people still see, to have trouble with the whoop section. If you are one of these people, then try to triple double out. A quick boost of throttle for the triple and then the double.


The pit were full of people and the competition was certainly fierce. The Pro 4 class has some top competitors from throughout Southern California.


Another shot of the pits.


The night of racing was extremely fun and I ended up qualifying second in rookie and then I took 1st in the main event. For pro 2 I qualified 6th and took 6th in the main. when you get a podium finish, OC/RC likes to give back to the racers with some RACE BUCKS! Check them out!


Good luck at the races! Remember, you can always ask me for help, just look for the KLA cars at the track.

-Matthew Garcia


Saturday, March 15, 2014

How to upgrade your Short course Buggy front tires. SC10b

I have been racing a good amount of indoor lately and I really needed to upgrade my front tires for my SC10B. A lot of racers just simply run their short course truck tires on their buggies, but what they don't realize is that the narrow front tires make the buggy drive much better. I am going to show how to make some custom front tires since most tire companies do not offer many options.

              First, get the correct front rims for a SCB and then get the short course tire you intend to make your front tire. In my case, I am using a Panther Rattler tire in the clay compound. I have been testing this tire at OC/RC and have found that I am pretty hooked up.


Furthermore, I like the wider stance that the 3mm offset JConcepts hazard wheels give my truck and buggy. Once you have the part you want to use, start to cut the tire in half. I cut the tire just outside the first tread from the center of the tire. It can be very scary to cut up a 25 dollar tire, but I assure you, the modification is worth it and come out well if you take your time. Try to cut a straight line and follow closely to the tread. For reference, just look at the image below.


Once you are done, you should end up with two halves of a tire and strip in the middle. Just look at the image one the left. You will notice that there is one tread on each side of the original middle seam of the tire.


Now we need to start gluing  a new seam down the center of the tire. You will want to make sure that when you glue the tire, the tread mimics the alternating pattern the tire had there originally.  


In order to get the seam to be consistent, the tire needs to be glued with a small bead of glue. Also, the beads of glue need to be spaced roughly a half an inch apart. Once all of the beads around the tire are glued, and the glue has dried, flip the tire inside out. We want to now re- create the seam down the middle of the tire.


Look closely at the gaps the beads of glue create. Once the tire is inside out, we want to glue up holes that are left. When applying the glue, put a light coat along one half of the  each seam and then use both hands to push both sides together. I like to push the tire together from bottom to top in the motion similar to zipping up a zipper.
You have to cut down the tire foam so that it fits in the new tire. The Panther foam is the same on both sides, but other foams, such as the Proline foam, are not. If you are using a Proline foam, cut the thick side, since the other side has a small lip on it. There Are grooves in the foam and I like to cut to about the first groove. If you are uncomfortable with cutting to the first groove, leave about a quarter inch extra away from the edge of the groove you have chose. After you have cut the foam, put it in the tire and see if you like it and if it fist nicely on the rim. If it does not fit correctly, cut a little more off the foam until everything fits nicely. You do not want the foam to protrude over the part of the rim you want to glue the tire on. Usually if there is too much foam, it will push over the back part of the rim where the tire is supposed to be glued. 


Both tires finished.


Another Look


                                                                            A side shot


The difference  between a full size short course tire.


Good luck at the races! Remember, you can always ask me for help, just look for the KLA cars at the track.

-Matthew Garcia

Sunday, March 9, 2014

How to upgrade the rear linkage on an sc10.2 and sc10b

I broke a ballstud in the main event the other day and I performed an upgrade the make sure that never happens again. In order to perform the upgrade, you need to get the correct parts! OC/RC had everything I needed.
You will need some HD ball studs #91050, some HD ball cups #91051, and some HD 65mm turnbuckles #91038. Also, you will need some M3 locknuts #25215. The locknuts are not in the picture.


You can clearly see that the new ballstuds are much larger! Make sure you do not forget to put a nut on the back of the ballstud you screwed into the hub carrier.
When you are screwing in the new ballstuds, be sure to screw in a few threads, and then back out a few threads. Repeat this process until the ballstud snugs up all the way down, just like the stock ballstuds do.


This is what the finish upgrade looks like once you are all done. I must say, the feeling of the rear linkage after the upgrade is amazing! The turnbuckle no longer rubs on the shock spring! Try it out for yourself and hopefully you will stop breaking that pesky rear linkage.


Good luck at the races! Remember, you can always ask me for help, just look for the KLA cars at the track.

-Matthew Garcia


A night at the races


I decided to do some racing on friday night at OC/RC. I raced rookie class with my SC10B and Pro2 with my sc10.2.  I ended up qualifying 2nd in rookie and 6th in Pro 2. During warm up in the main for Rookie, I ended up breaking a ballstud, the ballstud on the side that I broke the turnbuckle on the other day. The upgraded Lunsford turnbuckles caused other parts of the car to fail. I ended up performing and upgrade that I will cover in another post. The new track proved to be very challenging and stress certainly got a hold of me. I recently got some new Venom 70c 7000 Mah packs and they really gave me a ton of punch and the power never faded. I was happy that something I upgraded was working well.

I noticed that the back triple can be risky, so a safe way to conquer that obstacle is to double single out. If you double single out, you will have a better probability of staying on your wheels, unless you can consistently clear the triple in race conditions. Also, the whoop section can also be very challenging. I found that if you can find a good rhythm , such as triple double out, you can consistently make it through without flipping your vehicle. I see a lot of drivers trying to pin the throttle through the whoops and often times they end up wheels to the sky. Some advice from the guys whooping my butt is that you just need to drive slower and smoother, then you will start to go fast.

Good luck at the races! Remember, you can always ask me for help, just look for the KLA cars at the track.

-Matthew Garcia


Thursday, March 6, 2014

The Beginning

Hello,
         My Name is Matthew Garcia and this is the Beginning of my RC race blog. I started racing as a kid with a second hand RC10T and a helicopter motor and esc. These days I can actually support my hobby and indulge and the plethora of products out on the market. Today I was testing my sc10b at the new layout OC/RC has to offer. Someone bumped me while I was clearing the big triple and I snapped a turnbuckle in half! I decided to go ahead and upgrade to some Lunsford super duty turnbuckles. The turnbuckles are very top quality, except that they provide no adjustability once you have them together. The ball-cups are simply too tight. I get them together eventually and got back on the track after nearly wanting to pull my hair out. I did email Lunsford and I will note that they have AMAZING customer service and back their products 100% They made it right and I know that I wont be snapping any turnbuckles anytime soon.


The main reason for my outing today was to get my short course buggy dialed for this weekends Grass Roots Racing Series race at the Proline track. I made a modification to my buggy by putting a b4.2 wing in place of the rear bumper. After getting a few batteries in on the new track, I found that the new rear wing provided a ton of downforce and therefore a lot of traction. Check it out!


The SC10.2 was working pretty well today. I was testing out some Panther Rattler clay tires and I was hooked up! I had plenty of traction which made for a ton of very fun laps. If you ever see me at the track, feel free to ask for help! Just look for the KLA cars.
SC10.